
Text by BRYAN PERRETT, colour plates by PETER SARSON and TONY BRYAN
BRITISH TANKS in N. AFRICA 1940-42
The tank brigades were trained and equipped specifically to support infantry operations and were for the first years of the war known as Army Tank Brigades, although one formation, the 23rd Armoured Brigade, retained its original title throughout. Three Infantry tank regiments constituted a tank brigade, although they rarely fought together as a formation and the function of brigade headquarters was largely administrative.
In general, a regiment supported an infantry brigade, a squadron a battalion, and a troop a company. Operational control rested with the infantry commander unless enemy armour sought to intervene, when the tanks fought as squadrons and regiments under the control of their own officers.
The Infantry tank regiment was organised similarly to the armoured regiment, with minor variations. Close Support Matildas served in the squadron headquarters of Matilda regiments and the first Valentine regiments to reach North Africa. No CS version of the Valentine was produced, however, and as the stocks of CS Matildas dwindled this left Valentine regiments entirely without the ability to engage with high explosive. At Second Alamein this was remedied by up-grading the all-Valentine 23rd Armoured Brigade to brigade group status by adding a regiment of Bishop self-propelled guns which were on immediate call.
Teamwork between tanks, infantry and artillery was the essence of the set-piece attack. As originally practised, the battle drill began with an artillery bombardment of the objective. While this was still falling, the first wave of tanks would break into the position and subdue the immediate opposition. The second wave would arrive some minutes later, the timing being such that the enemy should not be able to put to good use any recovery he might have made after the initial shock of being overrun. The infantry would arrive just behind the second wave and should be faced only with disorganised and demoralised survivors. The tanks would then remain with the infantry until their anti-tank guns were brought up and the position consolidated against counterattack. On being released by the infantry commander, the tanks would withdraw a little distance to a Forward Rally where they would repair minor damage and replenish fuel and ammunition. The Forward Rally was regarded as the point where the next attack would be won and was organised to operate at top speed so that the tanks could report themselves available to the infantry commander who was to continue the advance.
This type of attack was carried out in daylight throughout the desert war and in Tunisia, with the exception of Second Alamein where the infantry attacked mainly at night; and here another drill, carefully rehearsed prior to the war, was carried out. The infantry led and the tanks followed closely behind with the object of being in very close support at first light. Having seized the objective, the infantry were very vulnerable to counter-attack until their own anti-tank guns could be brought up to form a defensive screen, and until they did arrive the tanks took over this role as well as providing direct fire support. Sometimes, if the distance to the objective was considerable, the infantry would ride on the tanks to a predetermined startline and would then proceed ahead on foot. The technique worked extremely well and Rommel later recorded his professional interest in it, commenting that 'the British storming parties would work their way up to our positions, accompanied by tanks which acted as mobile artillery, and would force their way into the trenches at the point of the bayonet. Everything went methodically and according to a drill.'
Within the framework described above there were numerous minor tactical situations which arose as a result of local checks. During these each arm dealt with problems which were causing the other difficulties; for example the tanks knocked out machine gun posts which pinned down the infantry, and the latter stalked antitank guns which held up the armour; through its Forward Observation Officers, who usually rode with the tanks, the artillery applied fire support as and where it was required.
Prior to the autumn of 1940 no Infantry tank unit was present in North Africa and the arrival of 7 RTR, equipped with Matildas, was concealed from the Italians until Operation 'Compass'. Within 24 hours the regiment, supporting 4th Indian Division, stormed its way through the fortified camps at Nibeiwa and Tummar and then ran riot inside Sidi Barrani itself. In January 1941, fighting with 6th Australian Division, it broke the back of resistance at Bardia and then at Tobruk.
A second Matilda regiment, 4 RTR, arrived in the spring of 1941 and, as already described, was brigaded with 7 RTR for the ill-fated Operation 'Battleaxe'. What could have been a disaster was avoided when one squadron from each regiment respectively held off both Panzer divisions for several hours until the British withdrawal had been completed.
During 'Crusader' no less than five 'I' tank regiments were involved in the relief of Tobruk. Inside the fortress was 32nd Army Tank Brigade, incorporating 1 RTR (actually armed with Cruisers), 4 RTR and 'D' Sqn. 7 RTR. ('A' and 'B' squadrons 7 RTR were at this time employed on tank delivery - by tradition, the regiment lettered its third squadron 'D'.) Supporting the infantry of 13 Corps in their drive on the right flank of the relief operation were the three regiments of 1st Army Tank Brigade, 8 RTR with Valentines, and 42 and 44 RTR with Matildas.
13 Corps by-passed Halfaya Pass, Solium and Bardia, but was forced to storm the fortified zones of Omar Nuovo, Libyan Omar and Fort Capuzzo which lay astride its lines of communication. The Omars were captured by 4th Indian Division and the two Matilda regiments, in spite of the presence of '88's at both locations, and Capuzzo was taken by 2nd New Zealand Division with 8 RTR in support. Meanwhile the Tobruk garrison had launched a breakout operation, led by 70th Division and 32nd Army Tank Brigade, and had progressed as far as Ed Duda. By 25 November 13 Corps had reached Belhamed, a mile or two away. The two forces joined hands the next day, following a brilliantly planned night attack led by 44 RTR. The Corps' operations had been conducted with a smooth efficiency throughout, aided by the fact that Rommel allowed himself to become completely absorbed in the great tank battle with 7 th Armoured Division to the south, and then embarked on his fruitless Dash to the Wire. On 31 December 1941 Bardia was stormed for the second time, the attack of 2nd South African Division being led by 8 and 44 RTR, and Solium was captured soon after. The Axis garrison of Halfaya Pass, completely isolated, held out until 17 January.
During the Gazala/Knightsbridge fighting the tank brigades fared as unhappily as the rest of the British armour. When Rommel attacked, both were lying just behind the line of infantry boxes which stretched from Gazala to Bir Hacheim: in the north was 32nd Army Tank Brigade, with 7 RTR and two squadrons of 42 RTR; further south was ist Army Tank Brigade, with 44 RTR and one squadron of 42 RTR. 8 RTR had been detached for specific operations and 4 RTR, recently converted to Valentines, did not arrive until the battle had begun.
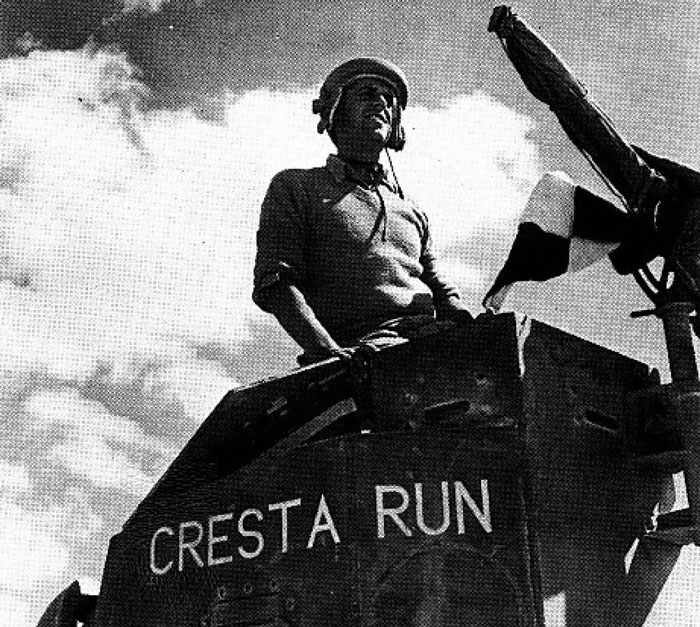
Stuart I 'Cresta Run' - a name perpetuated by 8th King's Royal Irish Hussars on its tanks in NW Europe. The crewman, in the hot, unpopular, and soon-discarded US tank helmet, holds the 'Action' flag - see Plate F2/9.
When the Afrika Korps swept round the southern end of the line on 27 May, 44 RTR launched an attack into the flank of 21. Panzer-Division, obliterating a motor rifle regiment but losing 18 Matildas in the process. The remainder of the regiment's tanks withdrew into the 150th Brigade Box and were fought to destruction when this was stormed.
On 5 June the long delayed and unco-ordinated British assault on the Cauldron took place. On the northern flank the 70 Matildas of 32nd Army Tank Brigade were to attack Sidra Ridge, accompanied by a Valentine squadron of 8 RTR. In theory this hammer blow should have smashed in the Axis flank, but actually resulted in such a stunning failure that the action became known as the Sidra Puzzle. First, the tanks rolled over an unmarked minefield; those which emerged were engaged by '88's firing invisibly from the east with the rising sun behind them, the glare preventing the British crews from making effective reply. 7 and 42 RTR suffered such severe losses that they were forced to combine their remaining resources. On 13 June Rommel attempted to isolate the 201st Guards Brigade Box at Knights-bridge by a pincer movement. One thrust was met and held by 7/42 RTR in a day-long action, and the other was contained by 8 RTR.
The battle was, however, irretrievably lost by now, and a general withdrawal to Egypt began while preparations were made for Tobruk to stand a second siege. The garrison included 32nd Army Tank Brigade, consisting of 4 and 7 RTR, both with Valentines, although the 7th retained a few Matildas and five Grants taken over from 1 RTR; both fought to the last tank when the fortress fell on 20 June.
The tank brigades' season of disaster had yet another month to run. On 22 July two regiments (40 and 46 RTR) of the recently arrived all - Valentine 23rd Armoured Brigade were committed to an attack which it was hoped would break the German line at Ruweisat Ridge. 23rd and 24th Armoured Brigades belonged originally to the 8th Armoured Division, which had trained with Valentines in the United Kingdom and was shipped with them to Egypt. The division never fought as a formation. None of the stated pre-conditions for the attack existed, but it was ordered just the same in the cynical belief that the new arrivals would not only be unaffected by the general tiredness and despondency, but would also be unaware of the inherent dangers and carry out the advance without hesitation. They did, some of their vehicles even breaking through to engage the DAK headquarters' own anti-tank guns before being picked off; this was achieved at a cost of 93 out of 104 tanks shot to pieces on an anti-tank gun killing ground.
Together, Sidra and Ruweisat led to opinions being expressed by the less thoughtful that the 'I' tank had had its day. The more perceptive realised that both actions represented a departure from orthodox principles in attempting to use the slow, under-gunned vehicles in the armoured brigade role. It was Montgomery who restored the balance, recognising that the forthcoming battle would be entirely positional and that the need for Infantry tanks had actually increased.
Of 8th Army's original Infantry tank regiments, 4 and 7 RTR had been lost at Tobruk and 42 and 44 RTR had been so badly mauled in the Gazala battle that they could only provide crews to man the Scorpion flail detachments. Only 8 RTR remained battleworthy, and was posted to 23rd Armoured Brigade, which became the army's specialist Infantry tank formation.
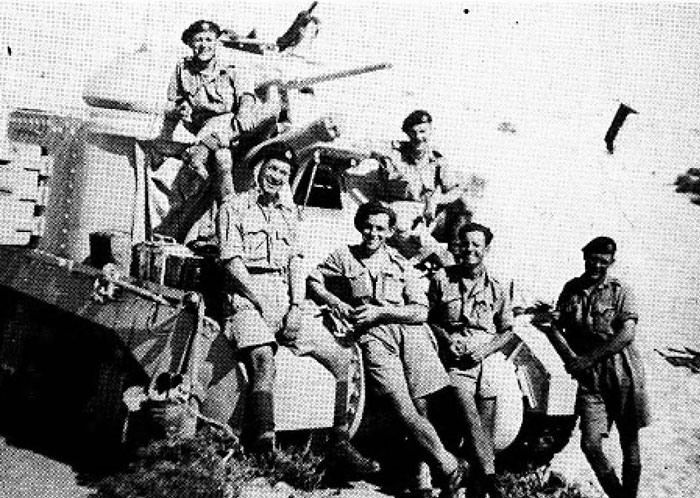
Grant crew of 2nd Royal Gloucestershire Hussars, 22nd Armd. Bde., pose in front of their apparently unmarked tank.
During Second Alamein the brigade (8, 40, 46, and 50 RTR) supported troops from 1st South African, 2nd New Zealand, 4th Indian, 9th Australian, 50th Northumbrian and 51st Highland Divisions, their combined function being to 'open the door' for the armoured divisions to pass through. Its regiments earned unstinting praise from whoever they worked with, none more than 40 RTR, who stood off 21. Panzer-Division's counter-attack on 9th Australian Division at Thompson's Post, trading four vehicles for every one of the enemy's knocked out but refusing to budge an inch.
For most of the advance to Tripoli the brigade was reduced to a single regiment, 40 RTR, which operated under the command of 51st Highland Division. Because its tanks snapped so often around the heels of the 90th Light's rearguards the Jocks christened the regiment 'Monty's Foxhounds', a title which stuck and which received the approval of the Army Commander; it was, in fact, the only unit ever to bear his name. Infantry tank brigades were prominent and notably successful in the later Tunisian fighting, of which some relevant account is given in Vanguard No. 13, The Churchill Tank.
The hard, grinding role of the Tank Brigades was less vulnerable to unorthodoxy than that of the armoured divisions and, because of this, their success was generally more consistent. It was a vital role, too often ignored, and without it the campaign would have taken a very different course. The hard-won Victoria Cross was awarded only twice to RTR personnel during the Second World War, on both occasions to Infantry tank officers serving in the desert: one recipient was Capt. Phillip Gardner of 4 RTR for an action which took place during the Tobruk garrison's break-out in November 1941, and the second was Lt. Col. H. R. B. Foote of 7 RTR for actions performed during the Gazala battle.
Without a reliable vehicle recovery, repair and delivery organisation no mechanised army can survive long in the field. In this respect the British were rather more efficient than the Axis, although high vehicle losses naturally resulted from defeats such as 'Battleaxe', when the enemy was left in possession of the battlefield. In simplified terms, the essential workings of the organisation - the responsibility of the Royal Army Ordnance Corps until the formation of the Royal Electrical and Mechanical Engineers - paralleled RAMC casualty clearance procedure in which wounded men were passed back through the Regimental Aid Post, Advanced Dressing Station, Forward Surgical Unit and on to a Base Hospital, with each stage absorbing a higher level of injury.
In vehicular terms, the first stage was the armoured regiment's own Light Aid Detachment. If the damage was beyond the LAD's capacity the regiment's technical adjutant would radio details to the brigade recovery officer, using a lettered code. This included such information as L - left hand; M - mined; N - clutch burned out; P - engine seized; Q - belly blown in, and so on. Thus an encoded message 'T12345 G678910 MQSRTU' would be understood by the Brigade Recovery Section as 'Tank No. 12345, at grid reference 678910, with mine damage to its belly, suspension damage, right hand track blown off, and unserviceable transmission'. The Recovery Section was then despatched, along with a detachment from Brigade Workshops which would assist in on-site repairs to tracks, suspension, engine etc., until the tank could be towed or driven to ground accessible to tank transporters and then back-loaded to the Workshops. Unless the suspension was intact enough for towing, burned-out tanks were abandoned, although repairable turrets would be salvaged, and suspensions from 'brew-ups' would be cannibalised to get other tanks moving.
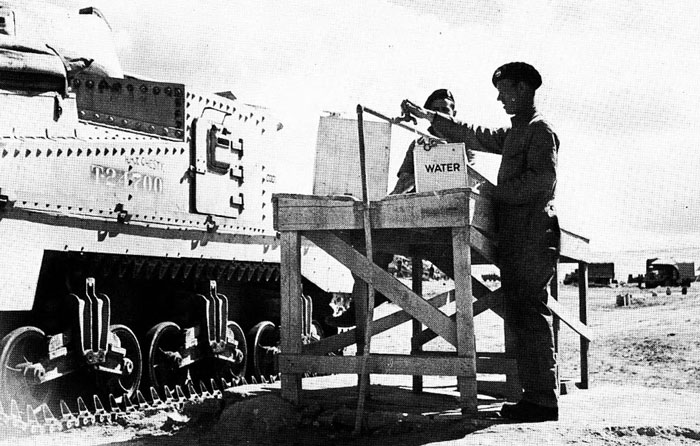
March 1942: Grant 'T-24700' of 'C' Sqn., 3 RTR is prepared for action. The old 'His Majesty's Tank' formula has been re-adopted - see name above WD number. The new signals procedure is evident from the '10B' marked inside the squadron circle; see also Plate G1. This tank was lost, along with T-24725, T-23544 and T-24243 near Bir Harmat on 30 May during the Gazala Line battles.
Repairs beyond Brigade Workshops' capacity, e.g. penetrations of and damage to transmissions, were back-loaded to a 3rd Echelon unit, the Tank Troops Workshops; if TTW were unable to cope, the tank would generally be back-loaded by rail to Base Workshops.
At all levels in the chain, suitable areas where transporters had hard ground and manoeuvring space for picking up derelicts were chosen and designated Collecting Points. Most recovery operations took place by night, as did most back- loading, to fit in with Corps movement control timetables. When things were going badly the tempo of back-loading had to be accelerated sharply.
At the start of 'Knightsbridge' Col. P. W. H. Whiteley was appointed Army Recovery Officer, and was immediately forced to think several stages ahead of normal procedure. 'The buggering about between Bir Hacheim and Capuzzo and Tobruk and Sidi Rezegh had to be seen to be believed. My orders were to beat the Germans at the recovery game. I was given a first-class radio network and we linked this in to divisions, and listened on regimental frequencies to 'guesstimate' where to apply our back-up and scarce resources.'
As the battle swung Rommel's way the LADs and Bde. Workshops performed prodigies which have never been sufficiently recognised. Whiteley's problem was handling 3rd and 4th Line casualties, and this was tackled in two ways. First, the 'badly wounded' tanks were taken to the Capuzzo or Fuka rail-heads, and shipped on flat-cars back to the base area production line facilities. Secondly, 'dead and dying' tanks were concentrated as far forward as possible, with the minimum of back-loading. Well apart from the Collecting Points, these tank graveyards were termed 'Help Yourself Dumps'; and apart from providing cannibalisation facilities, they caused the enemy to waste precious shells on what he imagined were AFV leaguers. During the retreat to Alamein crippled vehicles were blown up by recovery teams in danger of being overrun; Whiteley's own group demolished a Grant so effectively that it blocked three priceless railway tracks at Fuka, and after Second Alamein he was interested to observe that his Axis opposite numbers had been unable to remove it. The overall success of Whiteley's efforts can be judged by the fact that a good percentage of the tanks which fought at Alamein had been recovered during 'Knightsbridge' and the retreat.
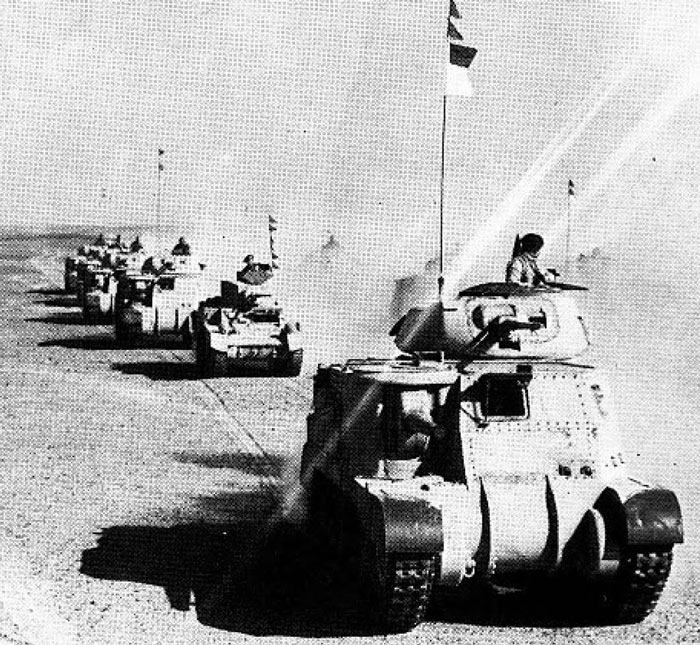
Grants of RHQ, 'B' and 'C' Sqns., 5 RTR, perform for the camera in February 1942. They are in overall Light Stone and unmarked; but the nearest has a squadron commander's pennant in red over light blue - battalion colours. The Stuart is probably an RHQ tank, flying navigator's multiple pennants.
Surprisingly, it was only after discussions between Whiteley and the commander of the RASC tank transporter column that a logical working relationship was established between the two organisations, which solved problems for both.
Transporters saved track-mileage by bringing regiments forward from rail-heads to operational areas; they also carried new and repaired tanks up to armoured formations' Forward Delivery Sqns. (see below), but would then return to railhead empty. The empty trailers suffered numerous weld failures due to vibration sufficient 'to wake Beethoven' (who, it will be recalled, was not merely dead, but deaf as well); there was seldom time for the tiresome chore of ballasting them. Whiteley's liaison led to an agreement whereby transporters would proceed to Collecting Points after making their forward deliveries, where the expert Recovery crews would load their cripples for back-loading to the rail-head. A consequent benefit was the immediate drop in the incidence of trailer failures.
Forward Delivery Sqns. were another essential link in the chain, and performed two functions for their respective armoured formations. They held the unwounded crews of knocked-out tanks, as well as replacement crews, until they could be found vehicles; and they delivered new and repaired tanks to regiments by means of those crews. At first their organisation was rather sketchy; as mentioned elsewhere, during 'Crusader' the Army's two forward delivery squadrons were in fact 'A' and 'B' Sqns., 7 RTR.
Finally, it is worth mentioning what was almost certainly the longest 'lift' of the entire campaign, when 50 RTR were sent up to rejoin 23rd Armd. Bde. during the advance on Tripoli. The tanks were loaded on to transporters near Alamein at the end of November 1942, and were not unloaded until 8 January 1943, ten miles west of Nofilia in Tripolitania - a run of 1,000 miles.
We have much more interesting information on this site.
Click MENU to check it out!
∎ cartalana.com© 2009-2025 ∎ mailto: cartalana@cartalana.com